To ensure that AppointNow is setup correctly, please complete alll the setup items listed below. Screenshots associated with the setup process can be found at the bottom of the page.
- Scheduler Production Type(s)
- Appointment slot duration
- Assign Production Type(s) to provider’s schedule
- Provider visibility for AppointNow
- Confirm AppointNow setup
- Embed code (web link)
Scheduler Production Type(s)
To define the Scheduler Production Type(s) visible in AppointNow:
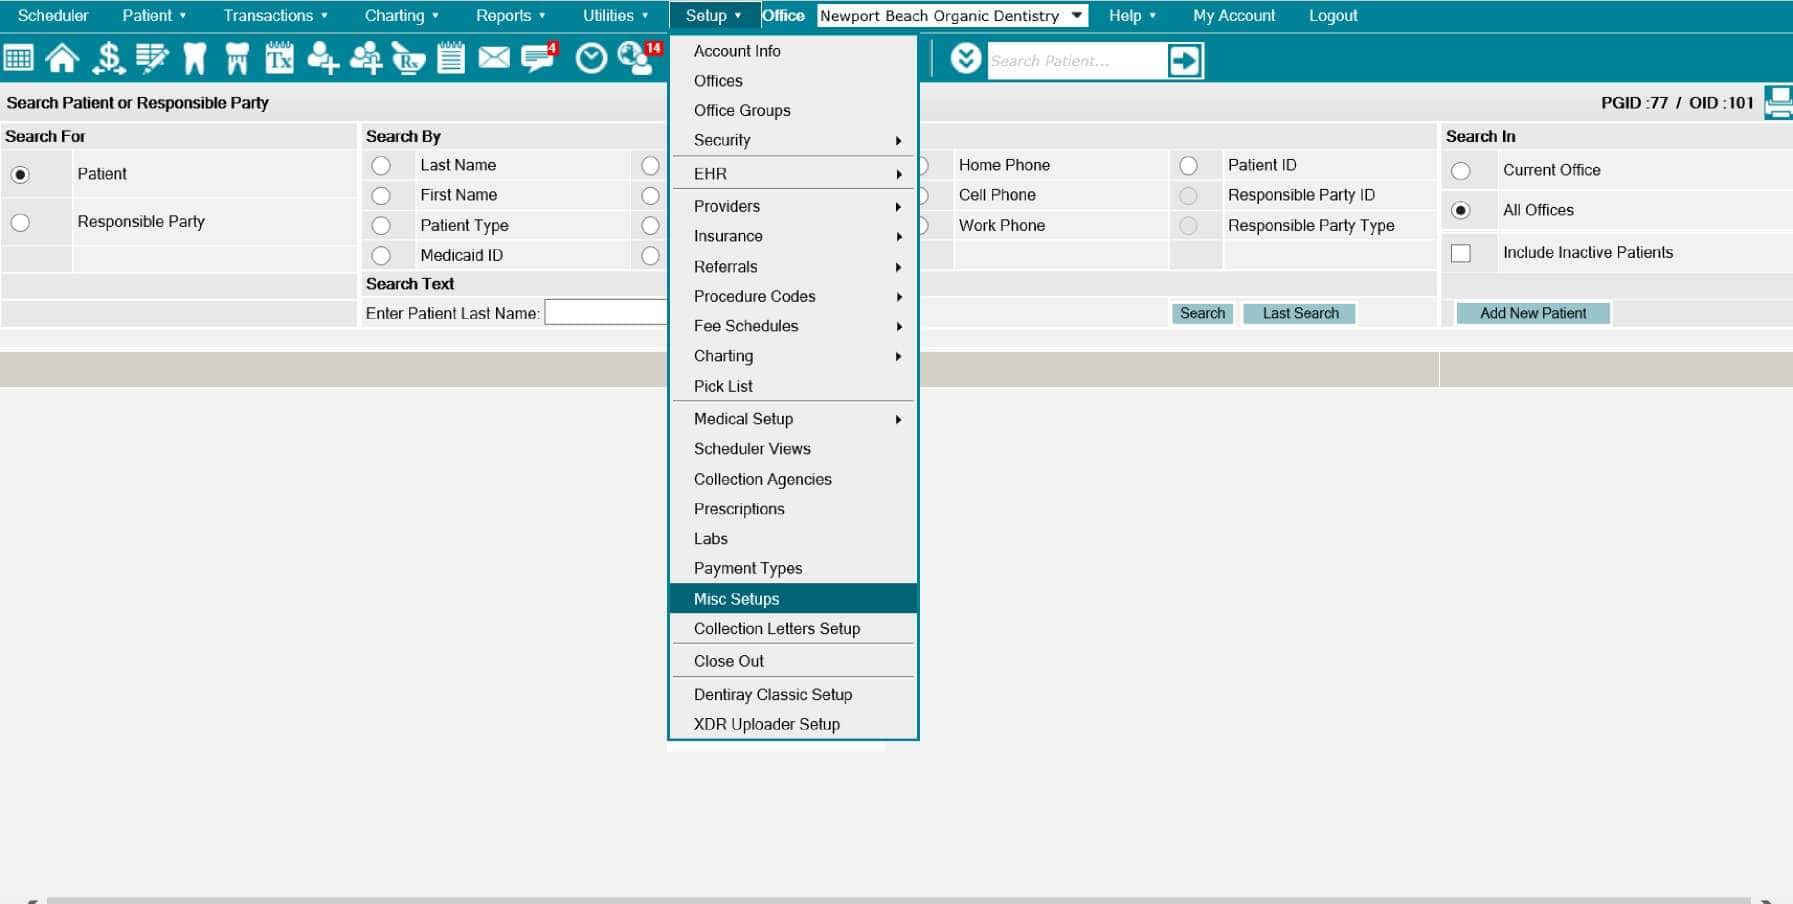
- Click “Setup”
- Select “Misc Setup”
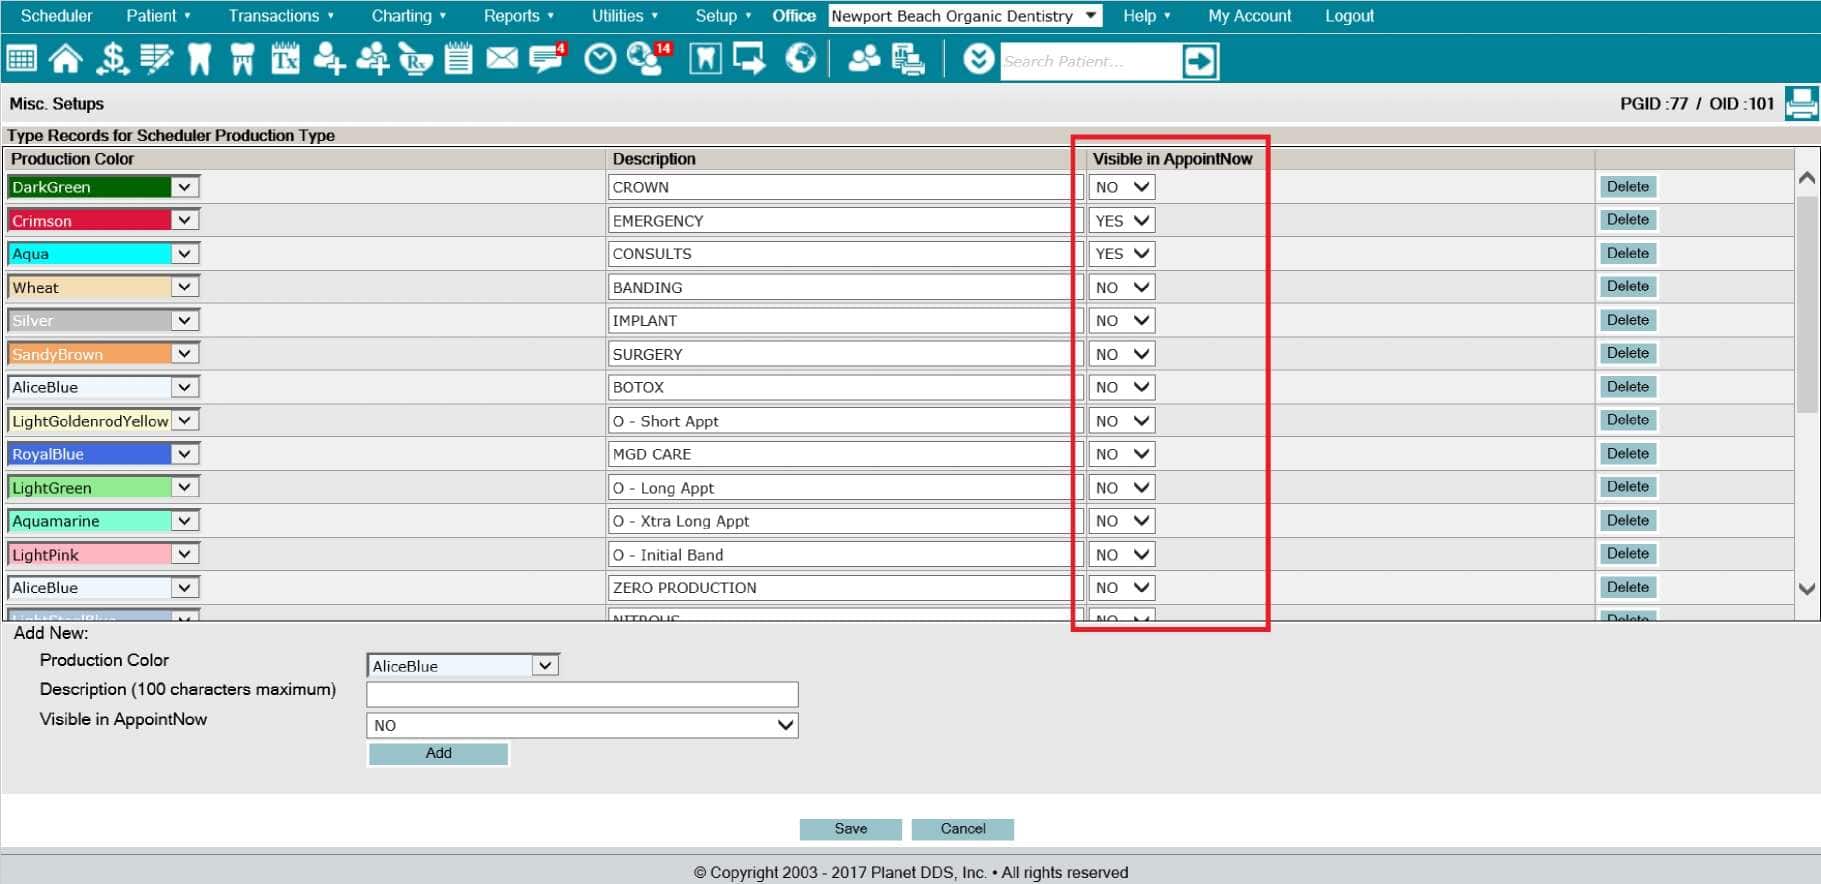
- Select “Scheduler Production Type”
- Click “Edit”
- Indicate “Yes” for the item(s) which should be designated “Visible in AppointNow”
- Click “Save”
NOTE: If the dental organization has only one Scheduler Production Type set up, the patient will not see a type option. If the dental organization has two or more Scheduler Production Type set up, the patient will be able to select the type of appointment.
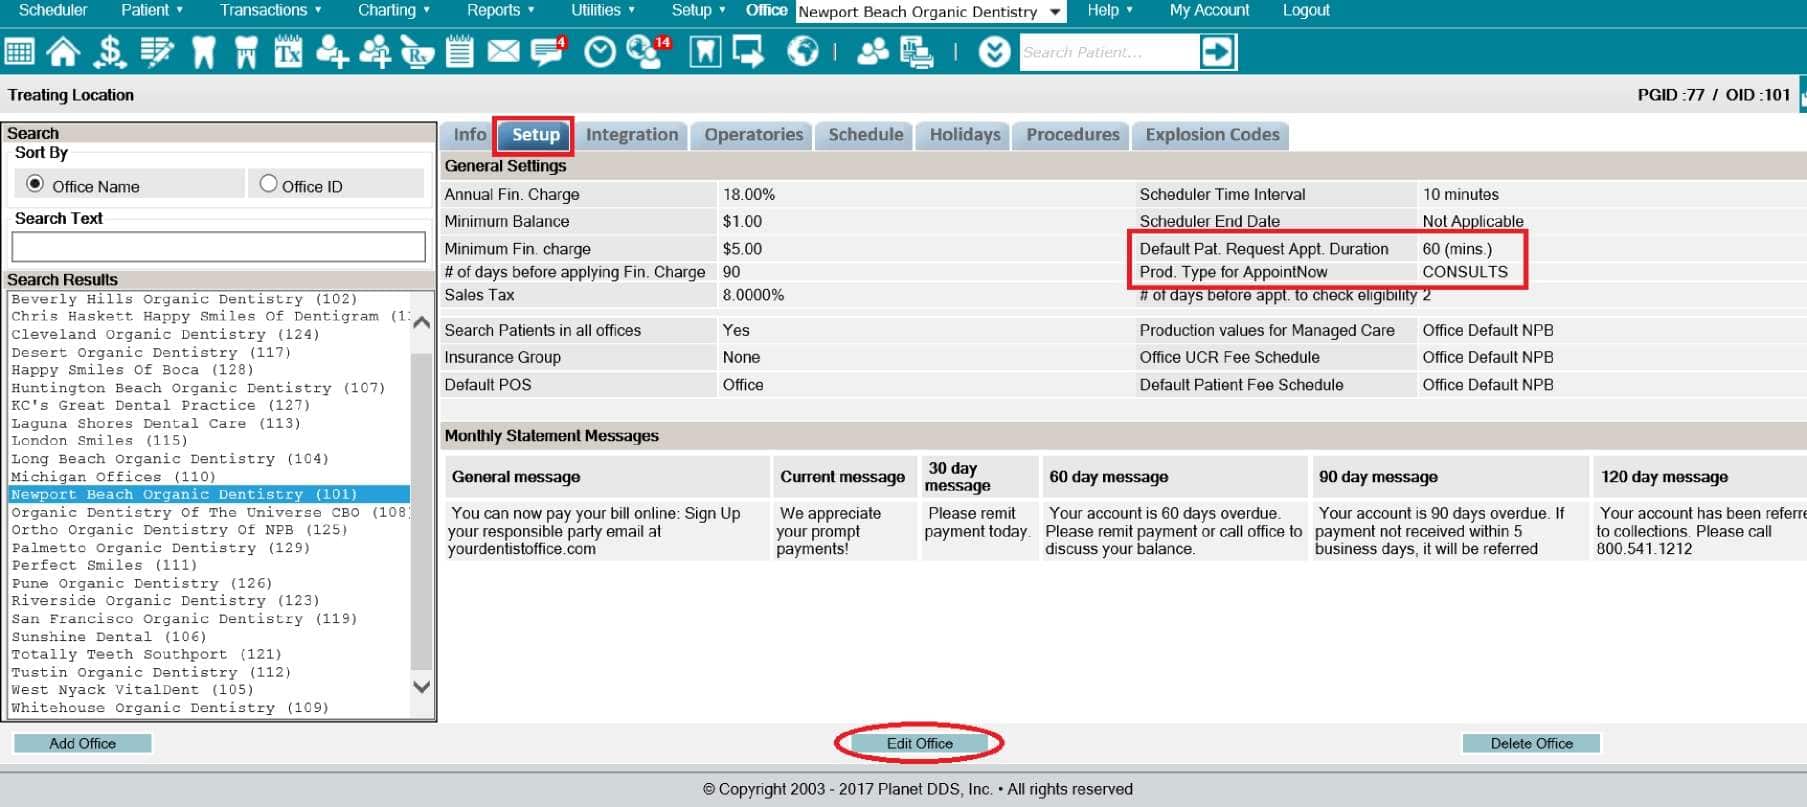
Appointment Slot Duration
To define the duration for a reserved appointment slot:
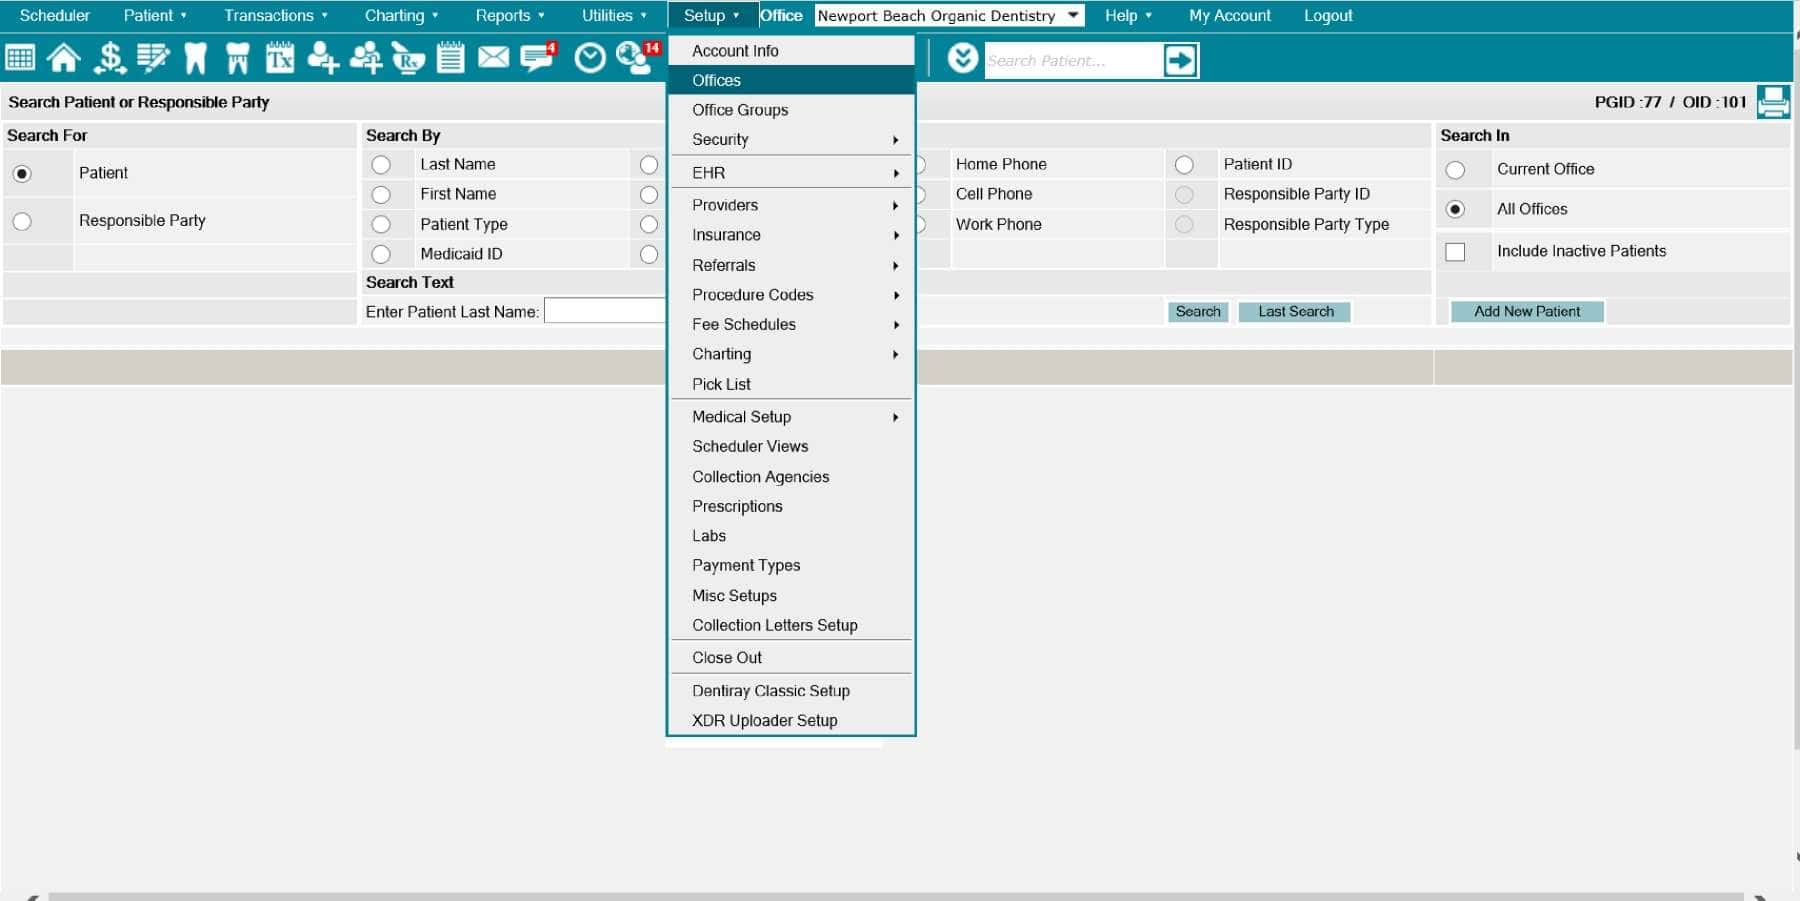
- Click “Setup”
- Select “Offices”
- Select the desired office location
- Click “Edit Office”
- Indicate the “Default Pat. Request Appt. Duration” field to the desired length
- Click “Save”
NOTE: The appointment duration applies to an office. The appointment duration does not apply to a specific provider.
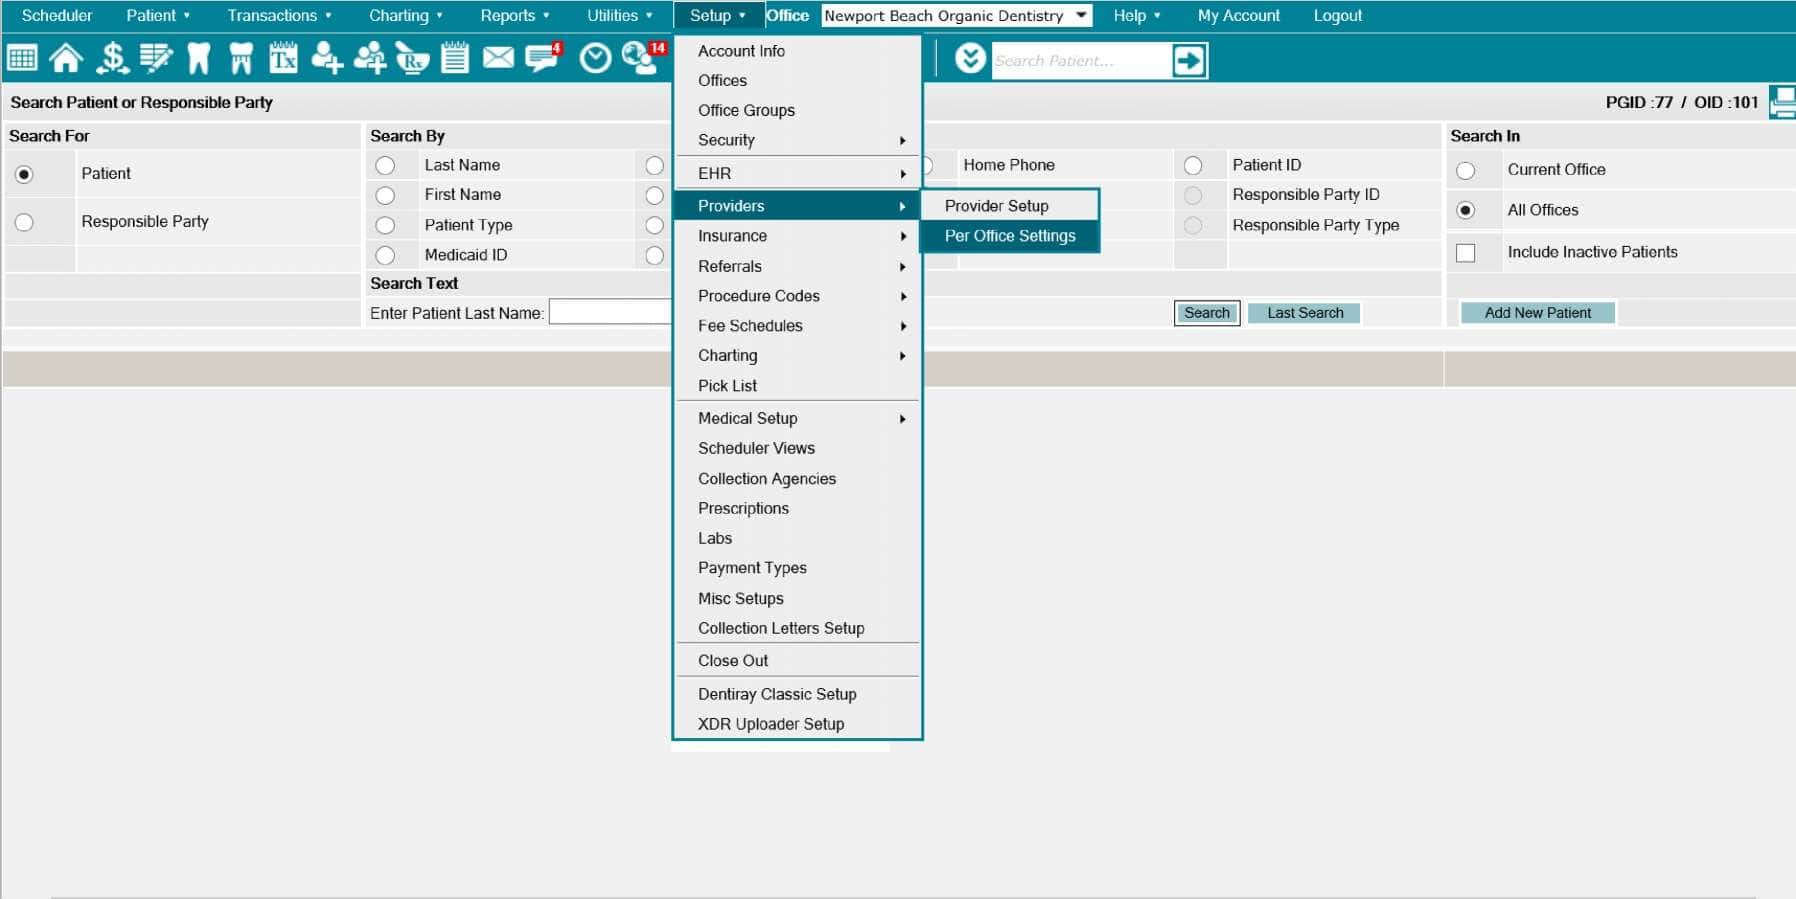
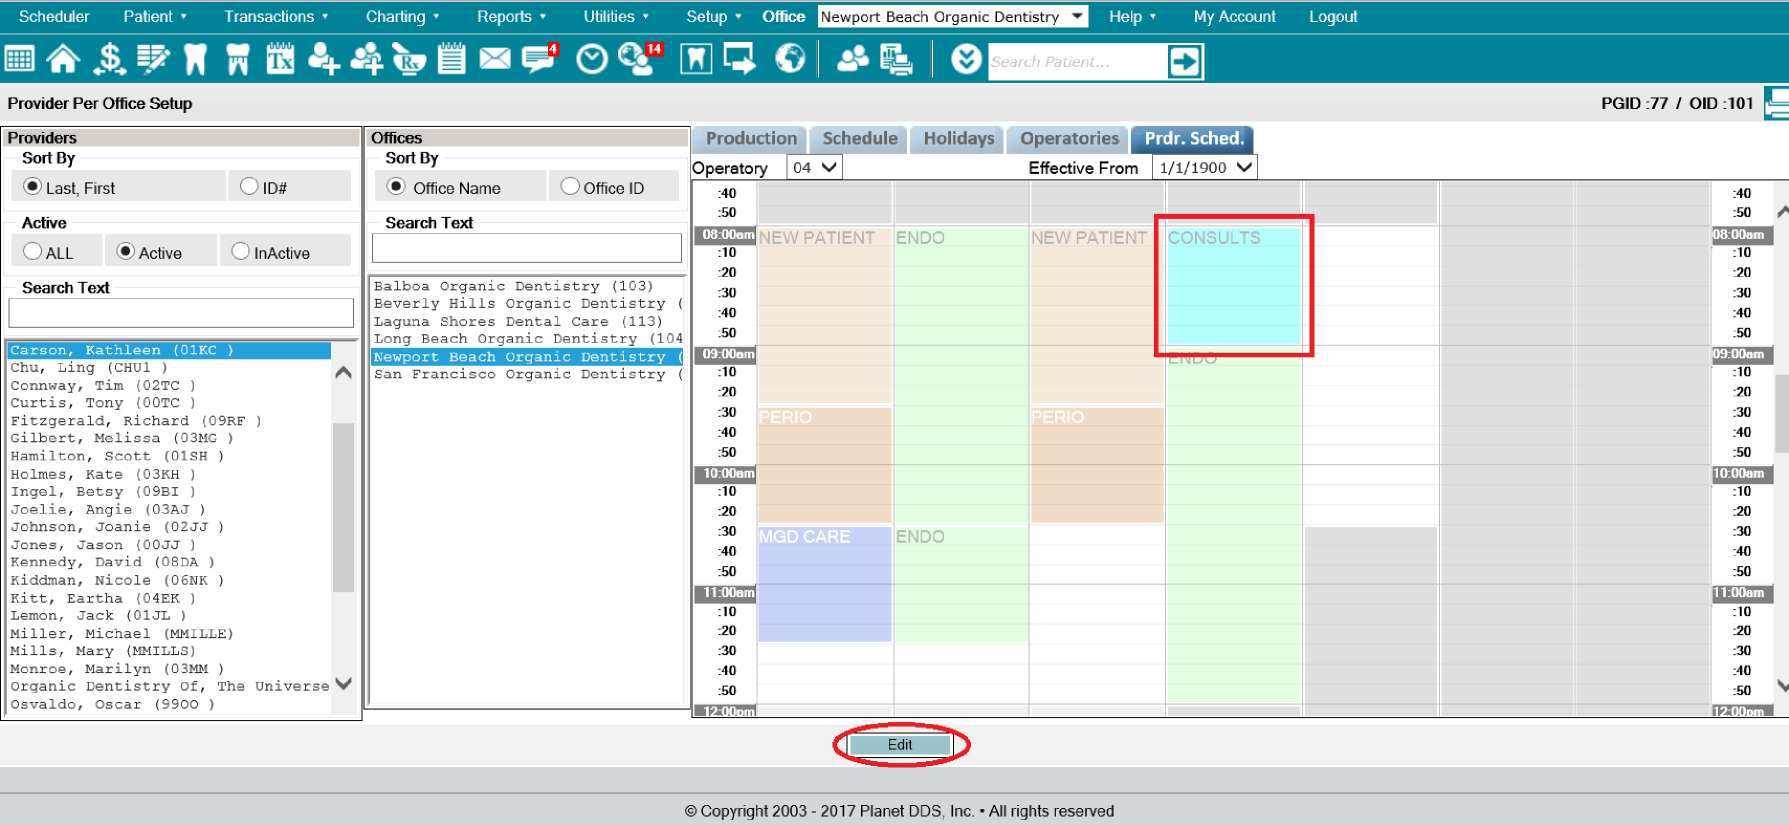
Assign Production Type(s) to provider’s schedule
To assign Production Type(s) to the provider’s schedule:
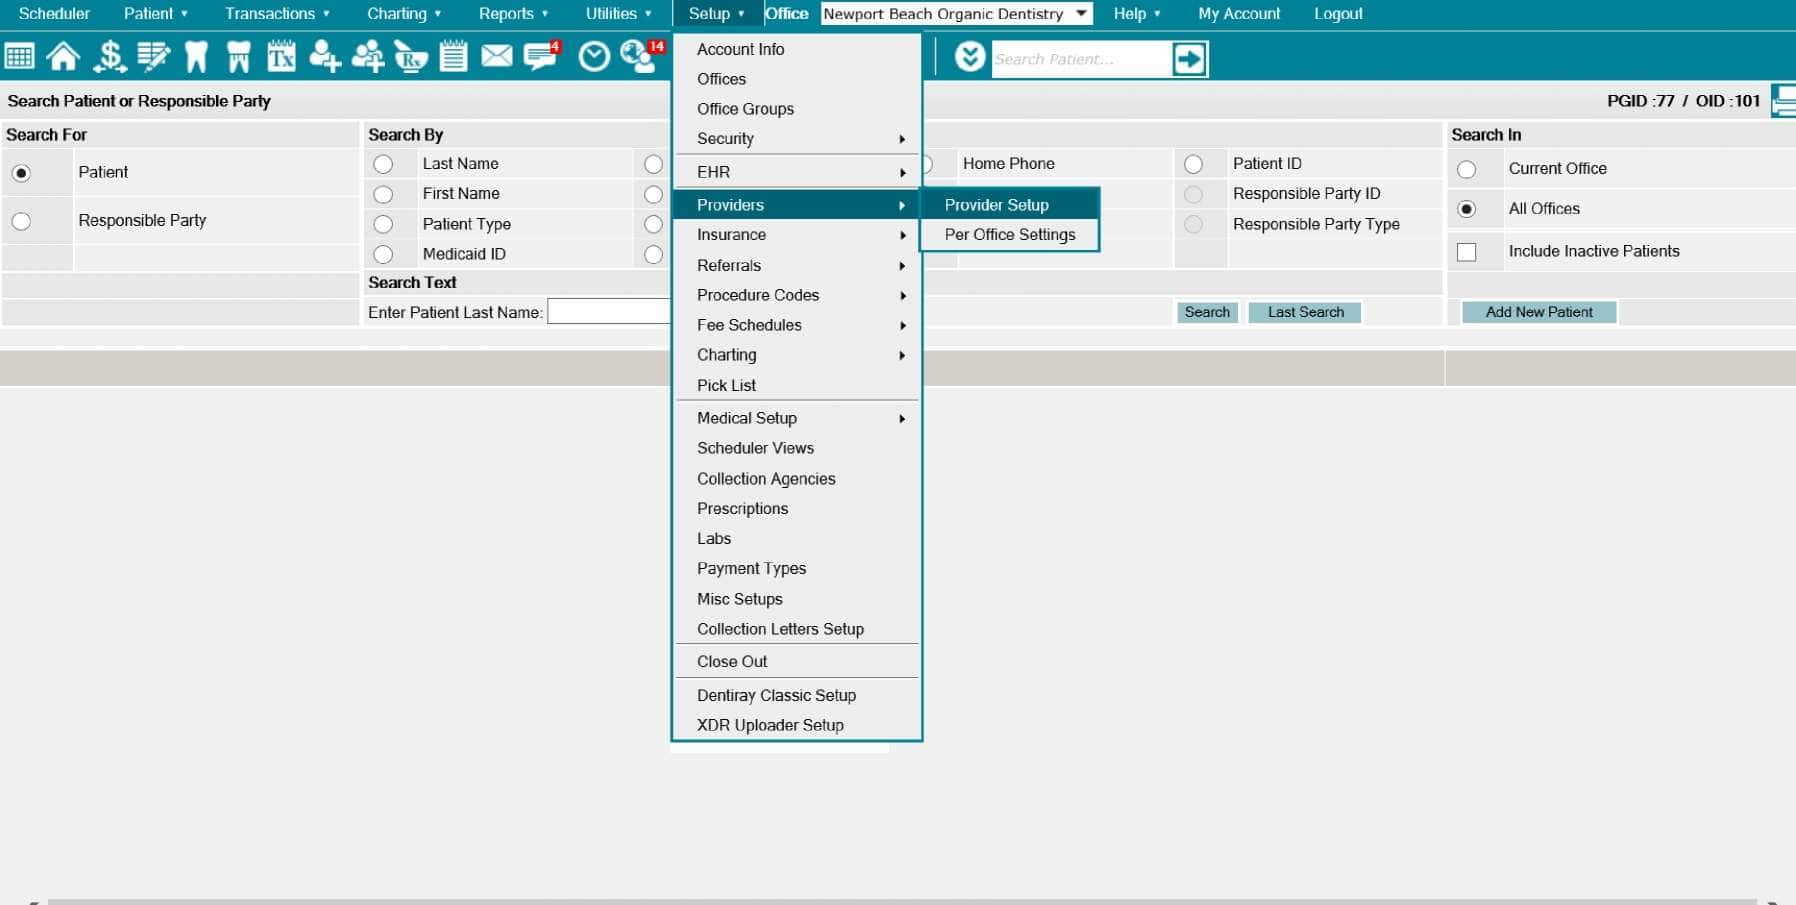
- Click “Setup”
- Choose the “Providers” and “Per Office Settings” options from the drop-down list
- Select the desired provider
- Click “Edit”
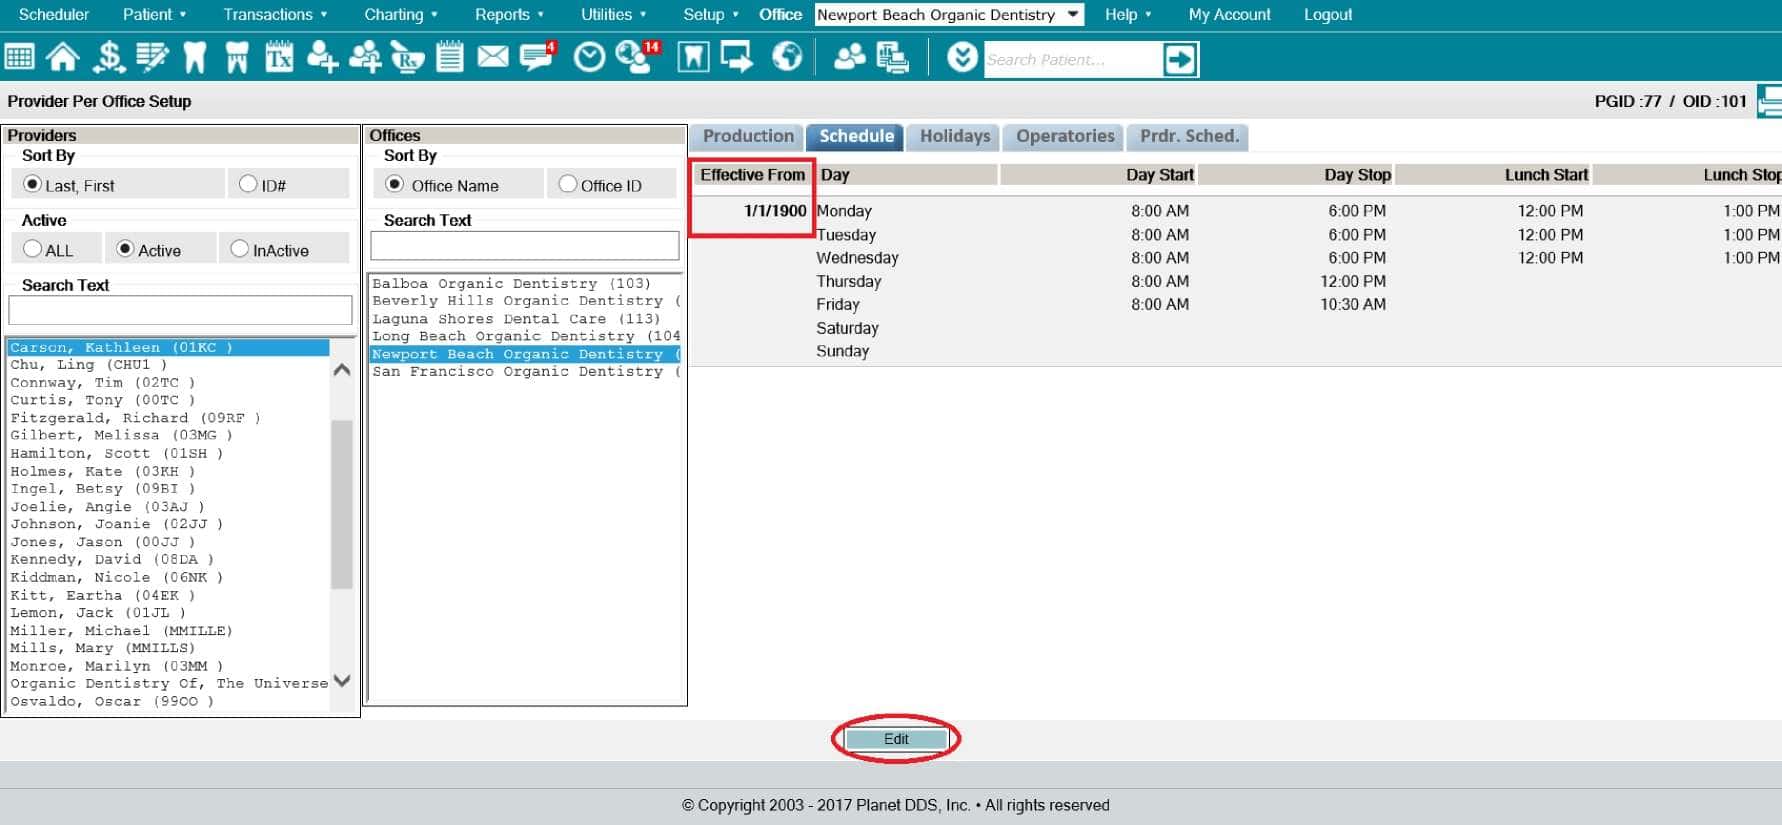
- Click the “Schedule” tab to ensure the provider has an effective schedule
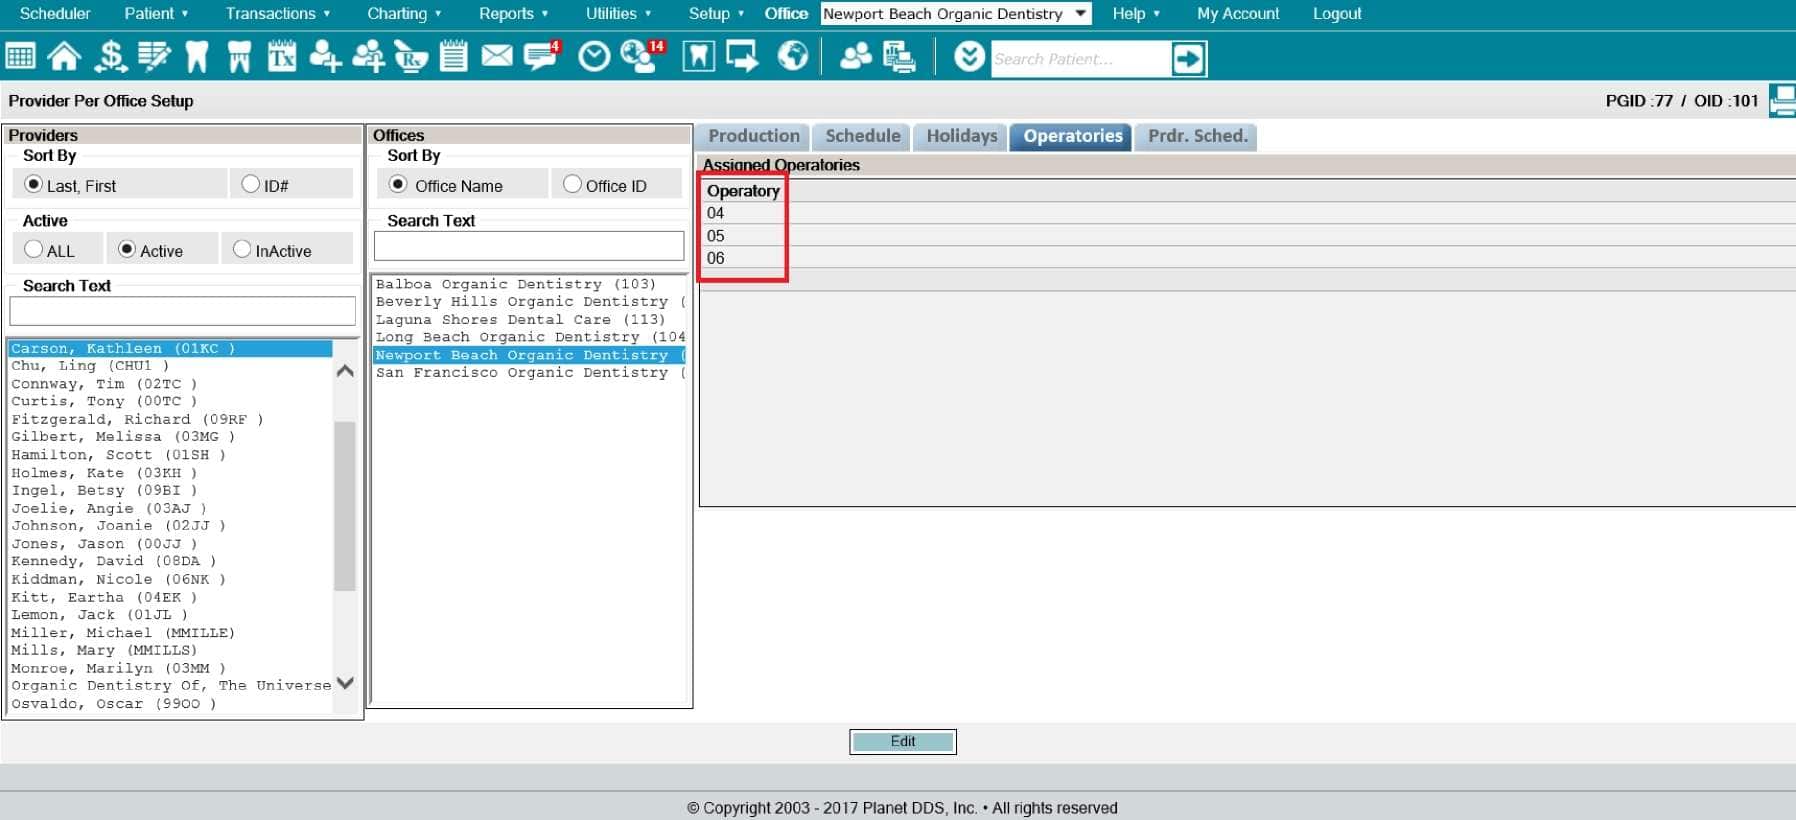
- Click the “Operatories” tab to ensure the provider has at least one operatory assigned for the location
- Click the “Prdr. Sched.” (Provider Schedule) tab to ensure that the “Production Type” indicated in the “Setup / Offices” screen is assigned to the provider’s schedule
- Click “Save”
NOTE: If there is not an “Effective From” section in the “Schedule” tab, the feature must be requested for activation via a Help Ticket.
NOTE: To display the optimal number of available appointments for a provider, we recommend that the scheduled times match the duration (or be a multiple) of time specified in the “Setup / Offices” screen. For example, if the duration of the appointments is 30 minutes, the schedule should be marked for 30 minute increments (i.e., 30, 60, 90, 120, 150, 180, etc.) It is not advised to indicate 45 minute blocks on the Schedule as they will not be optimally displayed.
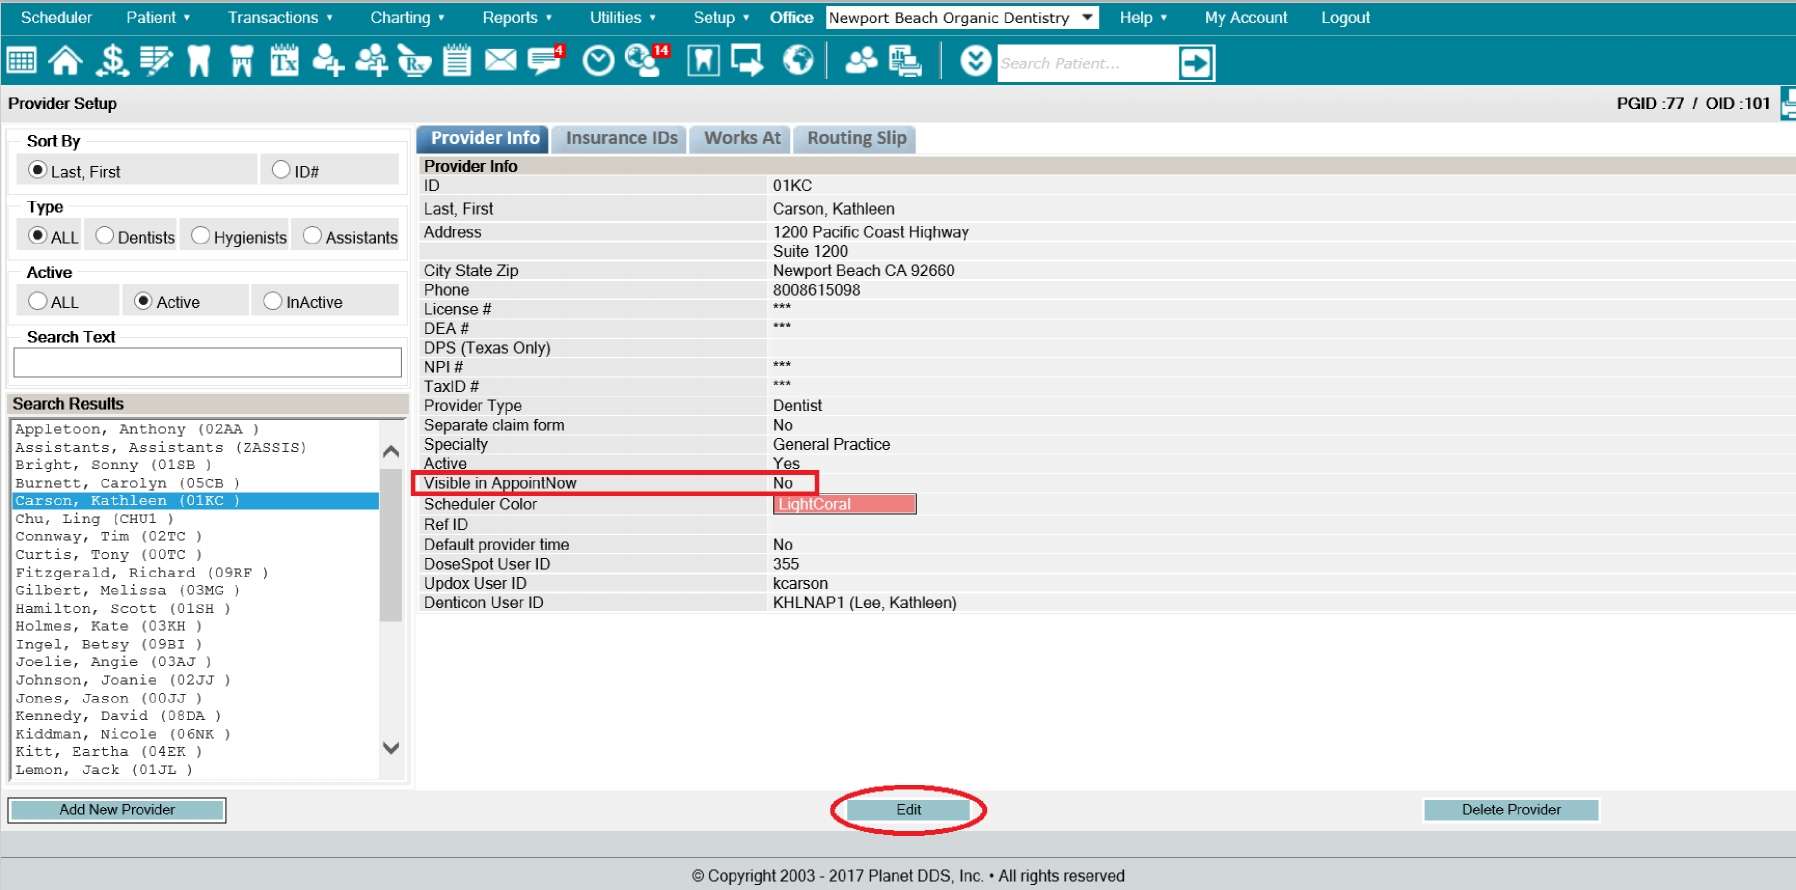
Provider visibility for AppointNow
To select which providers should be visible in AppointNow:
- Click “Setup”
- Choose the “Providers” and “Provider Setup” Options from the drop-down list
- Select the desired provider
- Click “Edit”
- Indicate “Yes” for the “Visible in AppointNow” option
- Click “Save”
NOTE: If the dental organization has only one Provider set up, the patient will not see a provider option. If the dental organization has two or more Provider set ups, the patient will be able to select the provider, or be able to leave the option as “Any Provider”.
Confirm AppointNow setup
To confirm that all the AppointNow setup items are complete:
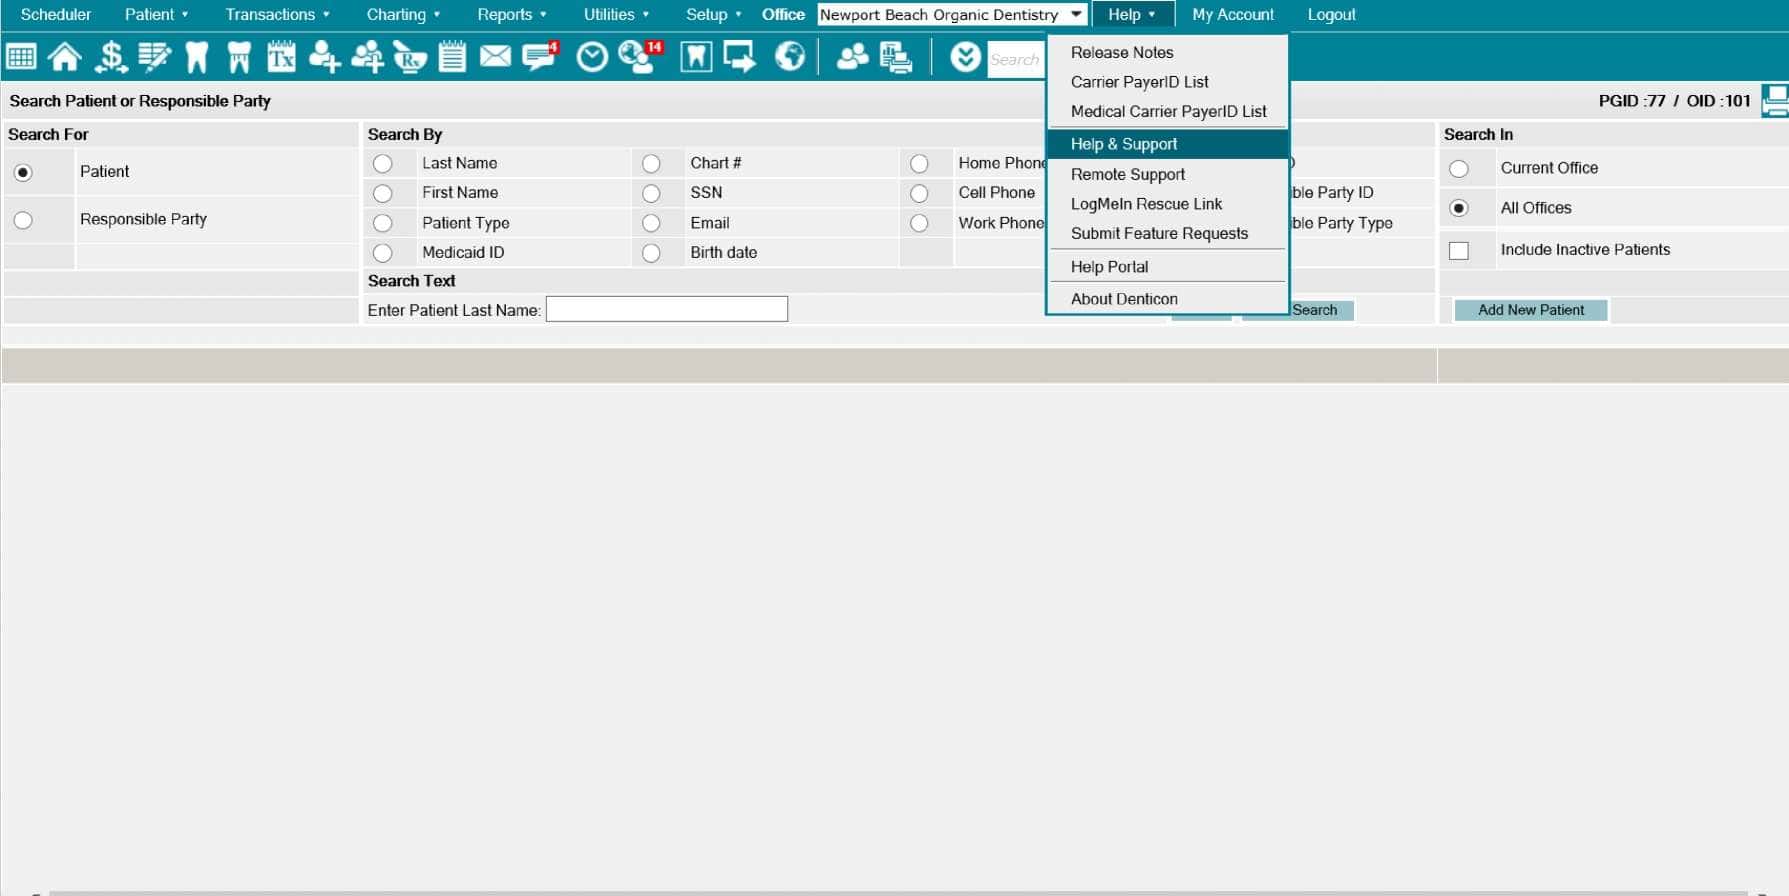
- Click “Help”
- Select “Help & Support”
- Click the hyperlink word “here” within the “To check AppointNow setting, click here” text
- A new window will open with status indicators next to each setup item
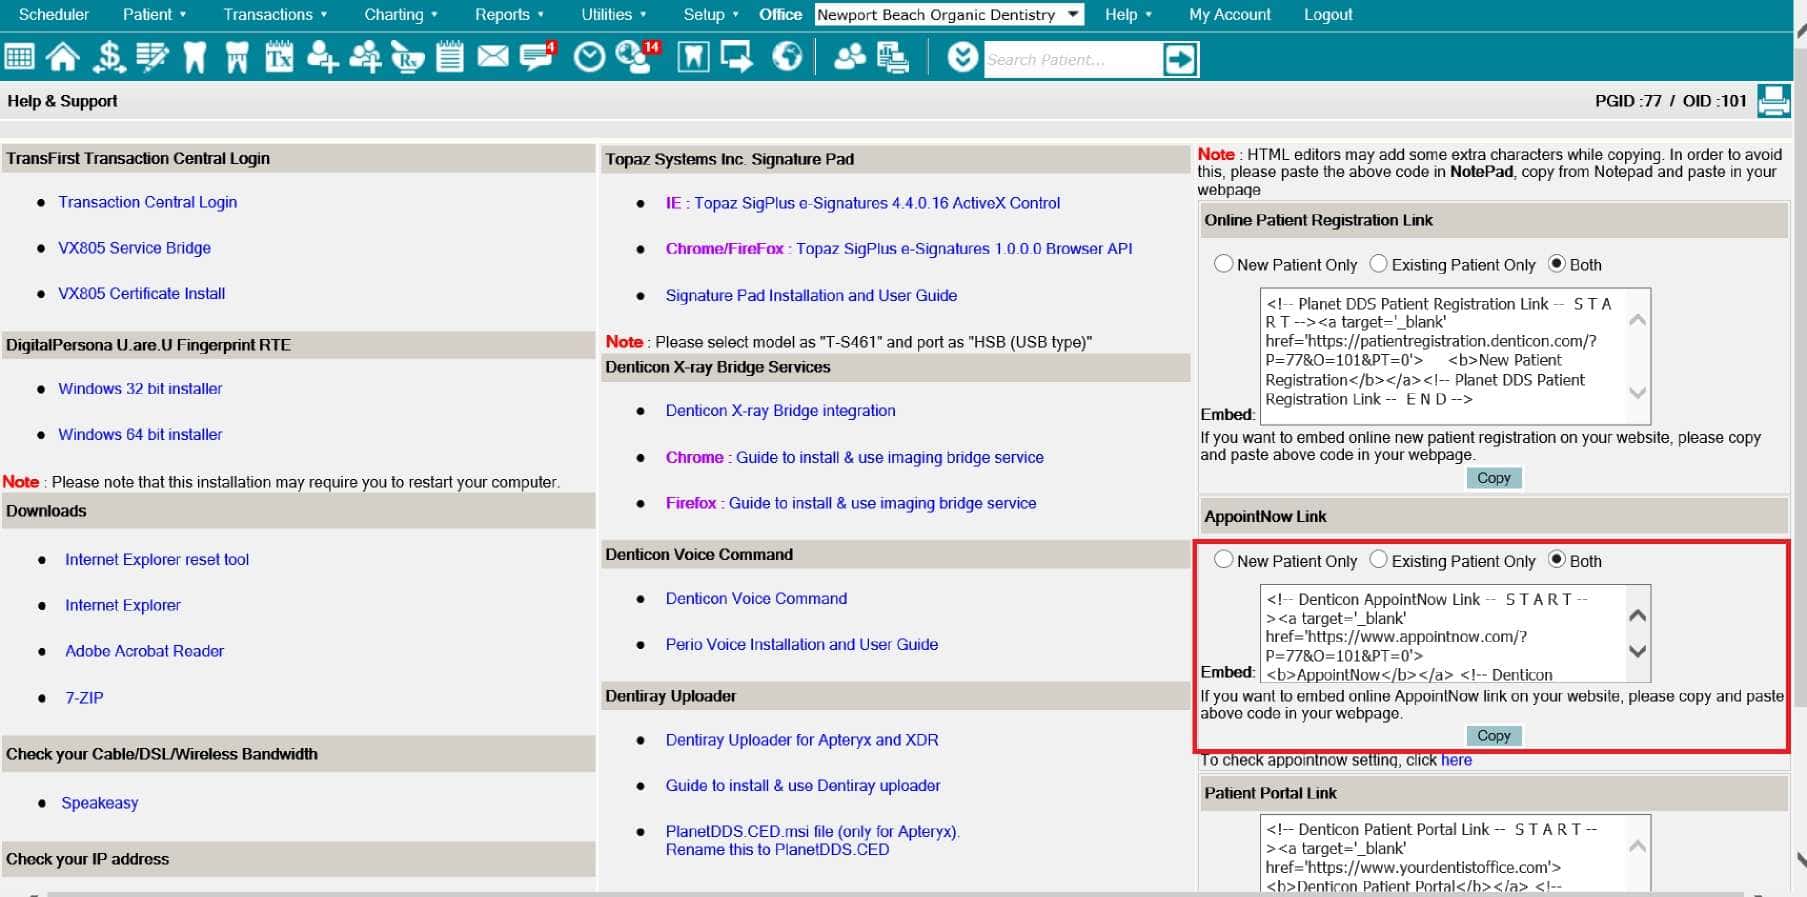
- Embed Code (web link)
Once all AppointNow setup items are complete and confirmed, to copy the AppointNow embed code for use online or in emails:
- Click “Help”
- Select “Help & Support”
- Within the AppointNow section:
- Select the desired option: “New Patient Only”, “Existing Patient Only”, or “Both”
- Click “Copy” to copy the embed code to the computer’s clipboard and paste it where desired
For any questions, please submit a ticket in the Denticon Help Portal.